How to use TabVault
Five steps from pinning the extension to restoring an entire browsing session exactly as you left it. Keep scrolling to watch it come together.
Pin the Extension
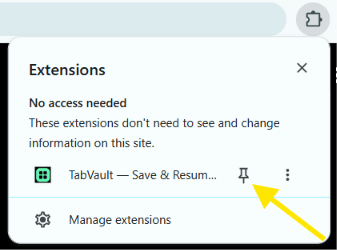
Before you save anything, click the puzzle-piece icon in Chrome's toolbar to open your list of extensions, find TabVault, and click the pin icon next to it. Pinning keeps the TabVault icon visible in your toolbar at all times, so you can Quick Save or restore tabs in a single click instead of digging through the extensions menu every time.
Welcome & Quick Save
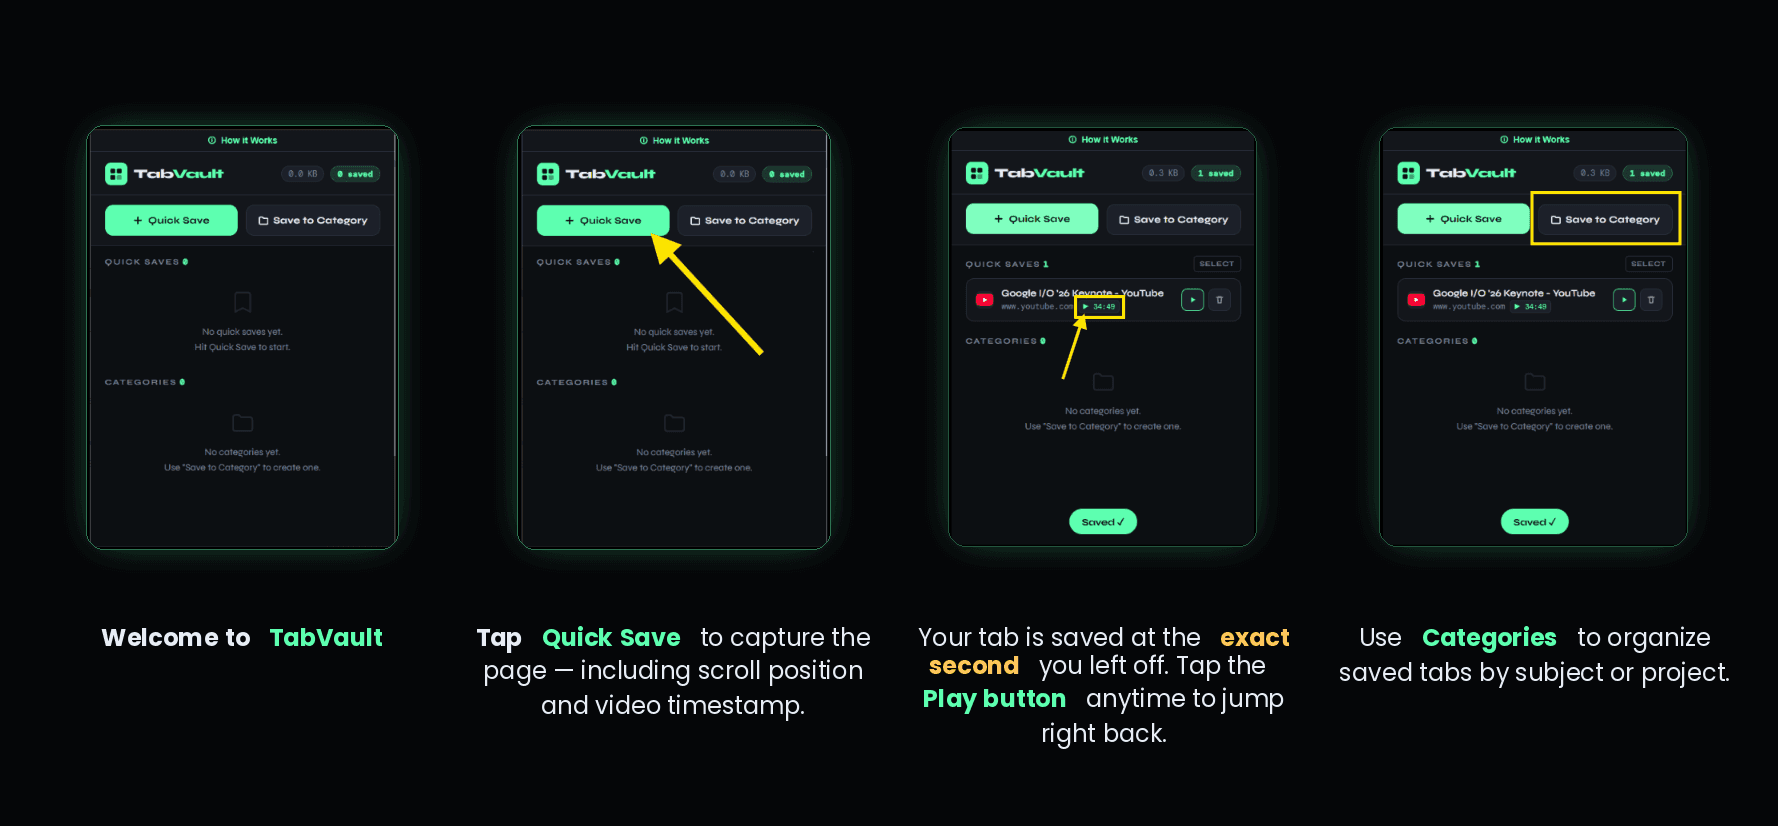
The moment you install TabVault, you're one click away from never losing your place again. Open the extension popup and hit Quick Save on any tab — no titles, no folders, no setup required. TabVault instantly captures the page's URL, scroll position, and (for video) the exact timestamp, so the tab is safe the second you close it.
Save to Category
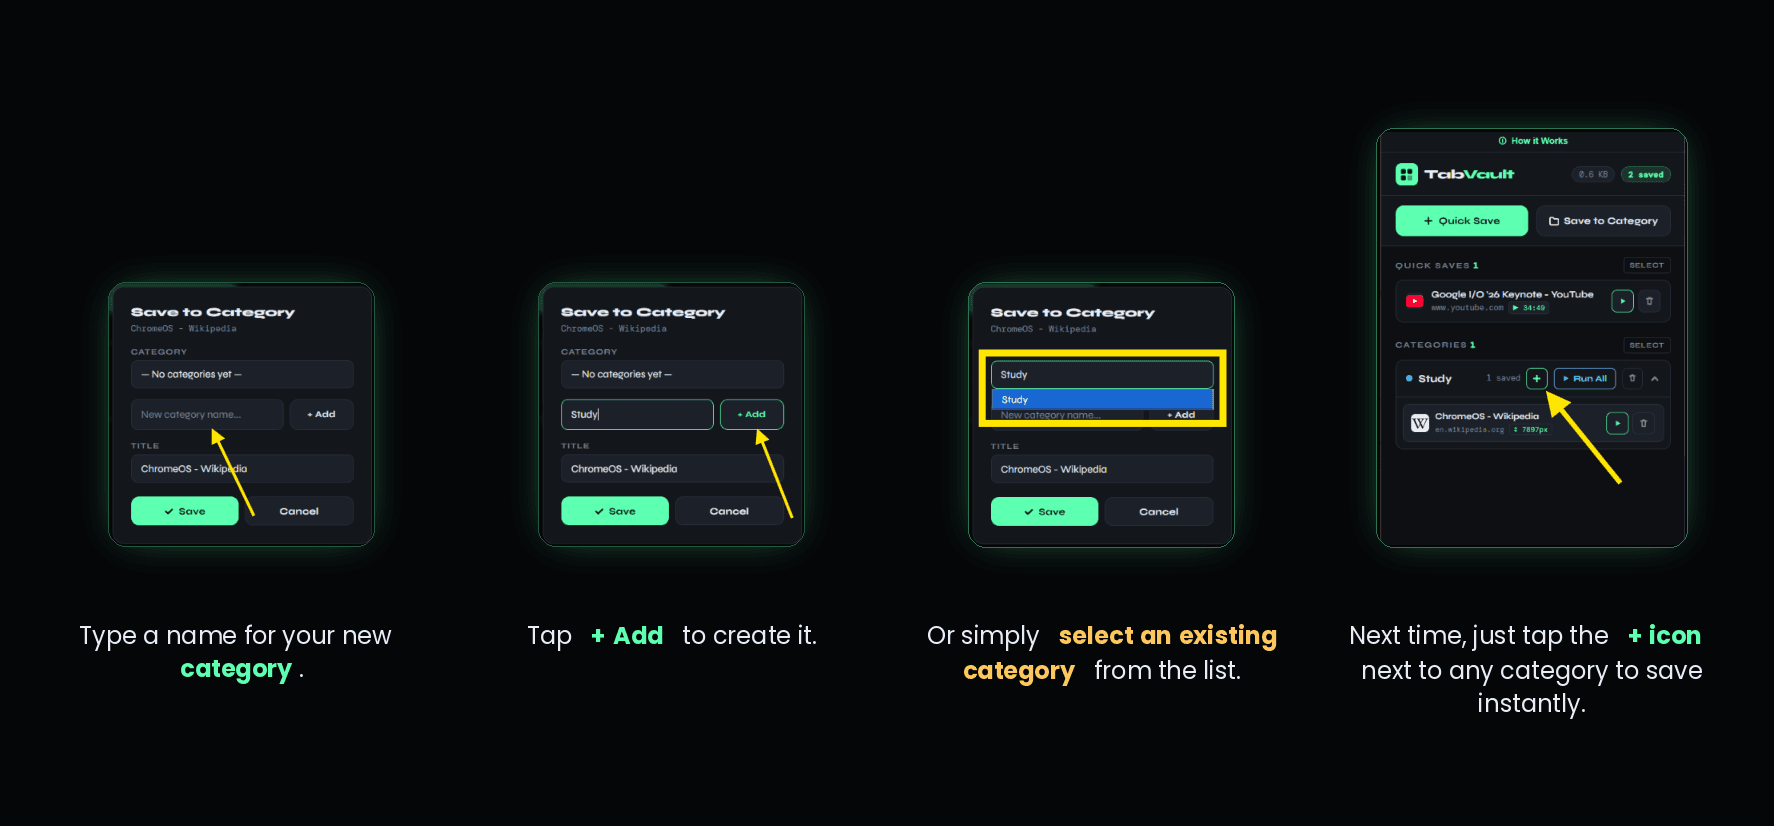
For tabs that belong together — research for a project, articles for a course, tools for work — use Save to Category instead of a Quick Save. Type a new category name and tap + Add, or pick an existing one from the list. Once a category exists, saving future tabs into it is just one tap on the + icon next to its name.
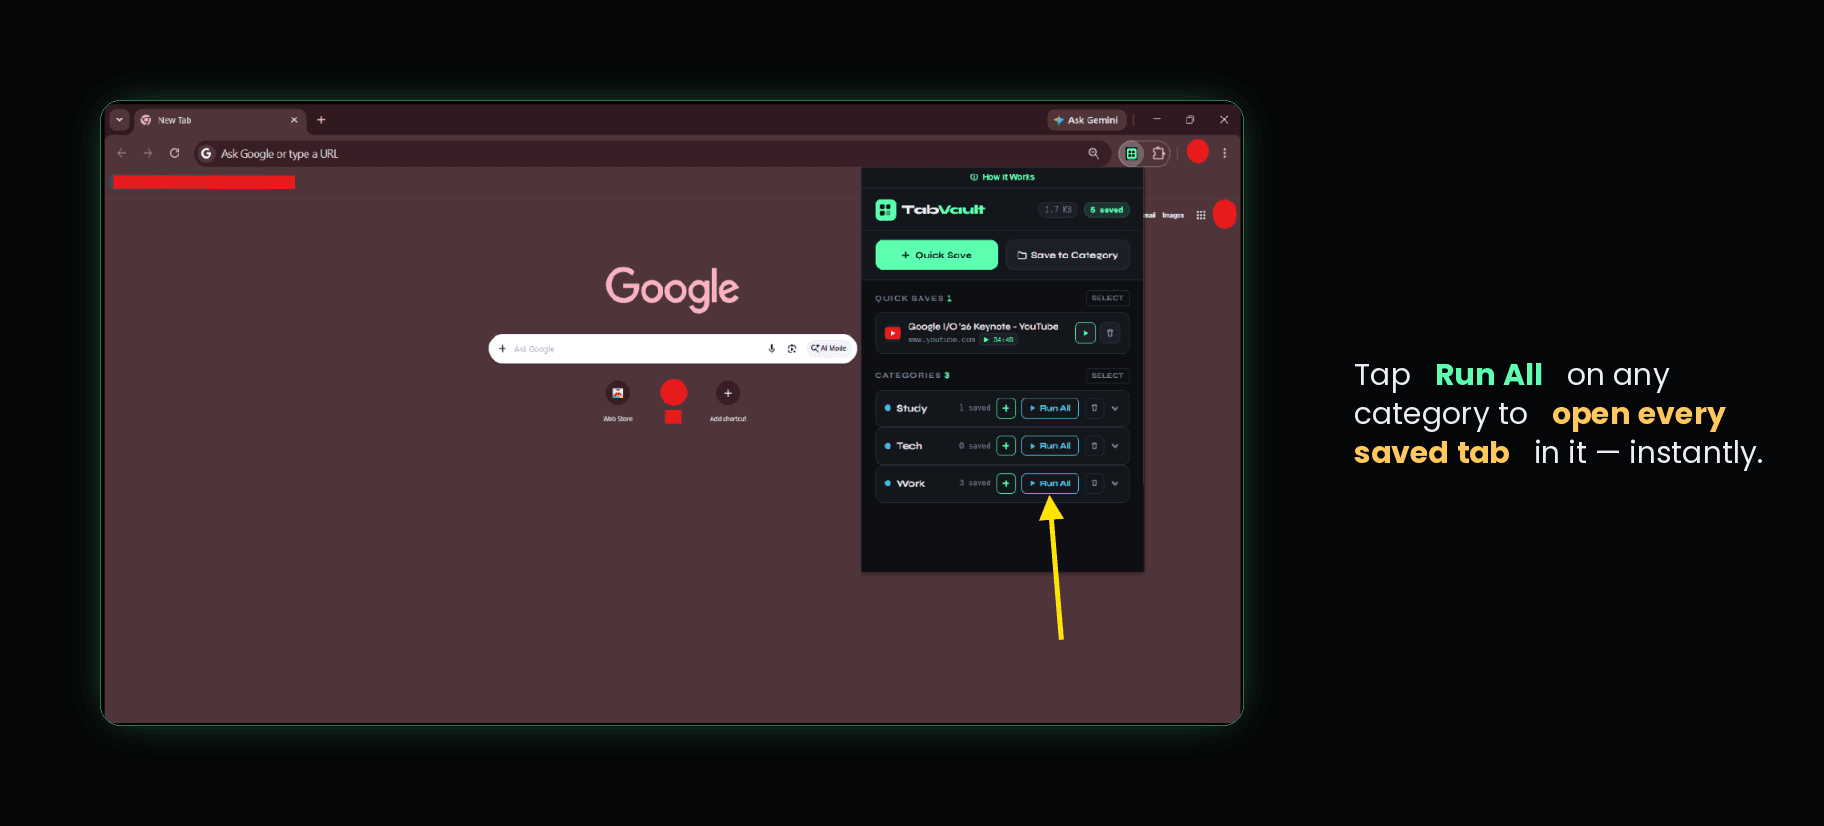
Click Run All
When you're ready to pick up where you left off, open TabVault and find the category you saved earlier. Tap Run All and every saved tab in that category reopens at once in fresh tabs — no digging through bookmarks or retracing your steps to rebuild your workspace.
All Tabs Restored
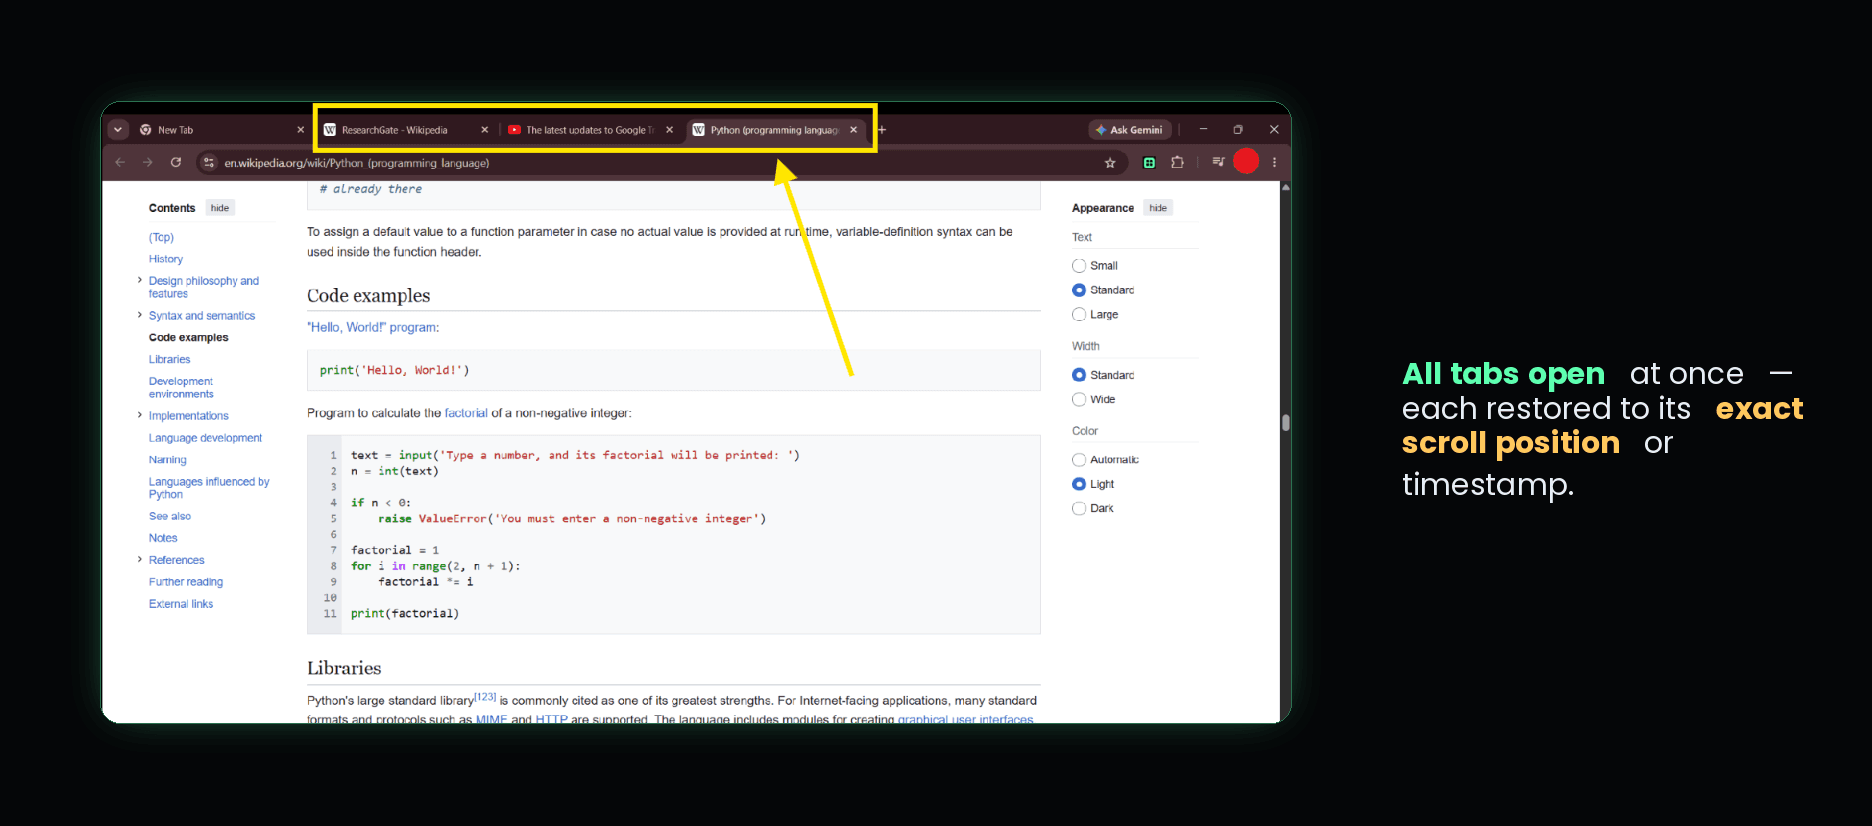
Within seconds, every tab from that category is back — each one scrolled to the exact position or video timestamp it had when you saved it. Whether it's a long Wikipedia article or a paused tutorial, you resume exactly where you left off, on every single tab.